
| Home |
Encouragement & Testimonials | Tips 'n Tricks | Free Pattern Directory | Tutorial Directory |
Knit & Crochet Combo Patterns | Useful Links |
Skill: Beginner
Sizes: 3-6 months. You can EASILY increase it. Just add an even amount of chains to each part. Let's say you were adding 2 (chains)... Add them to the front left, front right and back. If you have any questions just ask here for my email address (which is not published here due to spam issues).
Gauge:
It doesn't matter how loose or tight you work this. It will just fit the infant you are making it for a longer (if you crochet loosely) or a shorter time (if you crochet tight).
You will work this pattern in 3 pieces, right front, left front (both worked exactly the same way) and the back. At the end you will sew both the right front and the left front to the back.
The ch you do in this pattern at the beginning of each row DOES NOT count as the first stitch.
Materials:
J Hook
7-10oz sport weight yarn
Abbreviations:
dc = double crochet
ch= chain
sl= slipstitch
st= stitch
FRONT: (MAKE 2 OF THESE)
Ch 34 (this is half the length of the entire sweater).
Row 1: Ch 2, dc in each ch across, ch 1 turn.
Row 2: Dc in second dc from the ch 1, dc in each double crochet across ending with 1 dc in the ch 1 of the last row. (to do this bring your hook under the ch into the space that you will see under the ch.)
Rows 3-7: Repeat row 2.
Row 8: Ch 1, sl loosely, starting in the second st from the ch, in the first 18 st (forms your sleeve).
Row 9: Ch 2, dc in each st across of the 16 dc that are not crocheted in (forms your body)
Row 10: Ch 1, dc in the second st from the ch and in each st across.
Rows 11-19: Repeat row 10. Make sure not to go past your ch 2 from row 9.
BODY:
Ch 68.
Row 1: Ch 2, starting from the second ch from your ch 2, dc in each st across.
Rows 2-7: Repeat row 1 but just ch 1 at the beginning of the rows at the end working the same way as in row 2 of the front piece.
Row 8: Ch 1, starting in the second st from the ch, sl in the first 18 dc. This creates one sleeve.
Row 9: Ch 2, dc in 32 of the unworked stitches. STOP AFTER YOU HAVE DC IN 32 STITCHES. This creates the other sleeve becasue you do not crochet all the way across. So in the middle you have a section of 32 dc which is the body. That is the only part you crochet in.
Row 10: Ch 1, dc in each st of the 32 you dc in, working the last st of each row as you did in row 2 of the FRONT.
Row 11-19: Repeat row 10. Remember, don't crochet past the 32 dc you made in row 9.
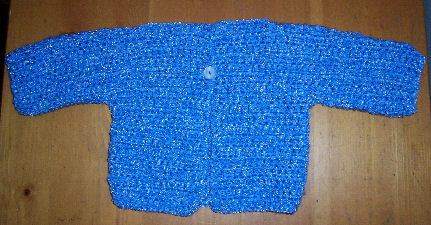
FINISHING:
Lay body out flat and place the 2 FRONTS on top of it so they match up. Sew with any stitch you want. Turn in-side-out on sew button(s) on anywhere you want, using the spaces in the dc for the button holes.